


Hai mai desiderato che lo schermo del tuo telefono fosse solo un po' più grande? Forse vuoi condividere quei meme esilaranti o le foto delle vacanze con amici e familiari sul grande schermo? Bene, amico mio, la soluzione è proprio a portata di mano, letteralmente! Collegando il tuo telefono alla TV tramite USB, puoi sbloccare un mondo completamente nuovo di intrattenimento e praticità.
Immagina di avere il tuo cinema personale, ma invece di limitarti a guardare, sei regista, produttore e star, tutto in uno. Con pochi semplici passaggi, puoi rispecchiare il display del tuo telefono sulla tua TV, trasformando qualsiasi soggiorno in una sala di proiezione privata.
Ma aspetta, c'è di più! Le connessioni USB non servono solo per mostrare e raccontare. Offrono anche possibilità per il gaming, la produttività e persino le presentazioni di lavoro. Immagina di poter giocare ai tuoi giochi preferiti per dispositivi mobili su uno schermo enorme o di fare una presentazione degna di una sala riunioni direttamente dal tuo telefono.
Quindi, tuffiamoci subito ed esploriamo il mondo di Connessioni USBPrendi il tuo telefono, la tua TV e preparati a rimanere stupito!
Indice dei contenuti

Informazioni sulle connessioni USB
Connessioni di base:
Quando si tratta di collegare i tuoi dispositivi, USB è come il coltellino svizzero dei cavi: versatile e maneggevole. A differenza dei suoi cugini HDMI e del mirroring dello schermo wireless, le connessioni USB offrono una combinazione unica di semplicità e potenza.
USB contro HDMI controMirroring dello schermo wireless
| Tipo di connessione | Professionisti | Contro |
| USB | - Semplice e ampiamente compatibile - Stabile e affidabile - Supporta audio e video | - Portata limitata - Richiede cavo |
| Cavo HDMI | - Audio e video di alta qualità - Lunga portata del cavo | - Limitato solo ad audio/video - Problemi di compatibilità |
| Mirroring dello schermo wireless | - Non sono necessari cavi - Posizionamento flessibile | - Potenziale ritardo o interferenza - Gamma e qualità limitate |
Al centro, la tecnologia USB (Universal Serial Bus) riguarda il trasferimento di dati tra dispositivi. È come una superstrada digitale, che consente al telefono e alla TV di condividere file, video e persino l'output del display senza soluzione di continuità.
Tipi e adattatori USB:
Non tutte le porte USB sono uguali. Nel corso degli anni sono emersi vari standard USB, ognuno con le sue capacità e peculiarità uniche. Dall'umile Micro-USB all'elegante e moderno USB-C, è importante sapere quale tipo supportano i tuoi dispositivi.
| Tipo USB | Descrizione | Usi comuni |
| Micro USB | Compatto e ampiamente utilizzato nei dispositivi più vecchi | Ricarica, trasferimento dati |
| USB-C | Connettore reversibile più recente | Ricarica, trasferimento dati, uscita video |
| USB 3.0 | Trasferimento dati ad alta velocità | Archiviazione esterna, telecamere |
| Tipo USB 2.0 | Trasferimento dati più vecchio e lento | Tastiere, mouse, stampanti |
Non temere se i tuoi dispositivi hanno porte USB non corrispondenti: adattatori e convertitori sono qui per salvarti la giornata! Questi piccoli gadget ingegnosi fungono da traduttori, consentendo ai dispositivi con diversi tipi di USB di comunicare senza problemi.
Preparazione prima della connessione
Controllo compatibilità dispositivo:
Prima di tuffarti a capofitto nel pool di connessioni USB, è fondamentale assicurarsi che i tuoi dispositivi siano compatibili tra loro. Dopotutto, non vorresti passare ore a cercare di collegare una linea fissa a un microonde, vero? (Anche se, chissà, forse questa è la prossima grande innovazione!)
Per verificare la compatibilità, consulta i manuali del tuo dispositivo o fai una rapida ricerca online per "USB screen mirroring" o "USB video output" seguito dai modelli specifici del tuo dispositivo. La maggior parte degli smartphone e delle TV moderne dovrebbe supportare le connessioni USB, ma è sempre meglio prevenire che curare.
Elenco dei dispositivi richiesti:
Ora che hai confermato la compatibilità, è il momento di raccogliere la tua attrezzatura. Ecco una rapida lista di controllo di ciò di cui avrai bisogno:
- Il tuo smartphone o tablet (la star dello spettacolo!)
- La tua TV (il fenomeno del grande schermo!)
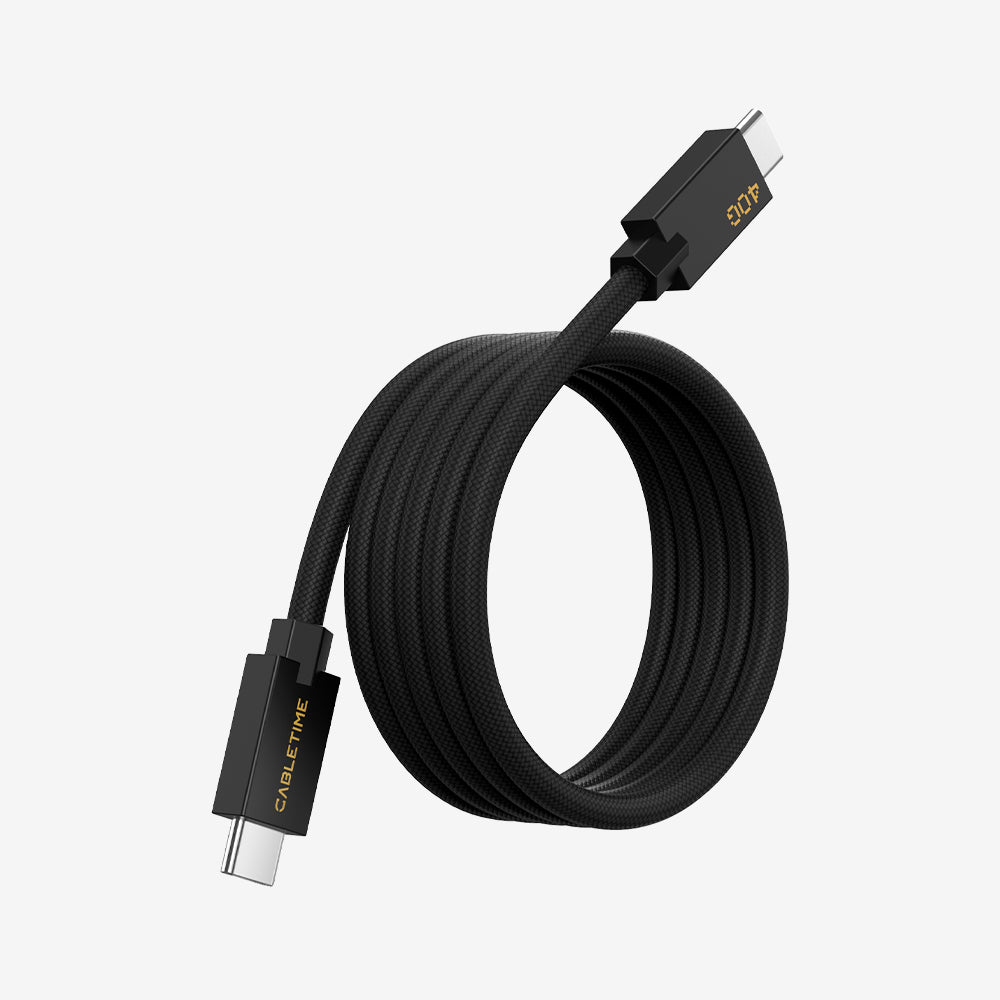
- Un cavo USBcompatibile con i tuoi dispositivi (il cordone ombelicale digitale!)
- Eventuali adattatori o convertitori necessari (i traduttori di lingua!)
A seconda della configurazione, potrebbe essere necessario anche:
- Una fonte di alimentazione esterna per il telefono (per evitare che la batteria si scarichi durante un uso prolungato)
- Una tastiera e un mouse wireless (per una facile navigazione e controllo)
- UN Hub USB(se la tua TV ha porte USB limitate)
Con tutta la tua attrezzatura assemblata, sei un passo più vicino a liberare la potenza delle connessioni USB!
Guida passo passo
Processo di connessione:
Bene, è ora dello spettacolo! Vediamo passo dopo passo come collegare il telefono alla TV tramite USB:
- Individuare le porte USB: Identifica le porte USB sia sul telefono che sulla TV. Di solito sono etichettate con l'iconico simbolo USB o con la parola "USB" stessa.
- Collegare il cavo USB: Prendi il tuo fidato cavo USB e collega un'estremità al tuo telefono e l'altra alla porta USB della tua TV. Se hai bisogno di adattatori o convertitori, assicurati di collegarli saldamente.
- Abilita il debug USB (solo Android): Sul tuo telefono Android, dovrai abilitare "Debug USB" nelle opzioni sviluppatore. Ciò consente al tuo telefono di comunicare con la TV tramite USB. Basta cercare "Debug USB" nelle impostazioni del tuo telefono e seguire le istruzioni.
- Seleziona la sorgente di input: Una volta che tutto è collegato, prendi il telecomando della TV e imposta la sorgente di ingresso sulla porta USB che hai appena collegato. Potresti vedere opzioni come "USB", "Media" o "Multimedia" - seleziona semplicemente quella appropriata.
- Specchia o estendi il tuo display: A seconda dei tuoi dispositivi, vedrai lo schermo del tuo telefono rispecchiato sulla TV o avrai la possibilità di estendere il display su entrambi gli schermi. Gioca con le impostazioni per trovare la tua modalità di visualizzazione preferita.
- Regola le impostazioni per una visualizzazione ottimale: Non aver paura di modificare aspetti come la risoluzione, l'orientamento e le proporzioni per ottenere la migliore qualità d'immagine possibile.
E così, hai collegato con successo il tuo telefono alla TV tramite USB! Non è stato più facile che provare a insegnare la fisica quantistica al tuo gatto? (Fidati, ci ho provato.)
Software e impostazioni:
Mentre la connessione fisica è la spina dorsale della tua configurazione, software e impostazioni sono i muscoli che la rendono davvero flessibile. A seconda dei tuoi dispositivi, potresti dover installare app specializzate o regolare determinate impostazioni per garantire un'esperienza di connessione USB fluida.
Ad esempio, alcuni dispositivi Android richiedono app di terze parti come Droid@Screen O Schermo X-Display Splashtop cablato per abilitare il mirroring dello schermo USB. Queste app agiscono come interpreti digitali, traducendo il display del telefono in una lingua che la TV può comprendere.
D'altro canto, alcune TV sono dotate di impostazioni integrate "USB Display" o "Mobile High-Definition Link" (MHL) che dovrai abilitare. Queste impostazioni stendono essenzialmente il tappeto rosso per il display del tuo telefono, consentendone la proiezione senza soluzione di continuità sul grande schermo.
Non preoccuparti se non sei esperto di tecnologia: la maggior parte dei dispositivi moderni ha interfacce user-friendly e istruzioni dettagliate per guidarti nel processo. E se tutto il resto fallisce, una rapida ricerca online o una visita al sito Web del produttore del tuo dispositivo possono fornirti le risposte di cui hai bisogno.
Risoluzione dei problemi
Problemi comuni:
Anche la connessione USB più attentamente pianificata può a volte incontrare qualche intoppo. Ma non temere, amico mio: ti copriamo le spalle! Ecco alcuni problemi comuni che potresti incontrare e come risolverli:
Nessuna visualizzazione sulla TV:
- Controlla attentamente i collegamenti dei cavi e assicurati che siano ben collegati.
- Cambia la sorgente di ingresso del televisore e prova una porta USB diversa.
- Riavvia sia il telefono che la TV.
Scarsa qualità dell'immagine:
- Regola le impostazioni di risoluzione e proporzioni sui tuoi dispositivi.
- Utilizzare un cavo USB o un adattatore di qualità superiore.
- Aggiorna il firmware della tua TV o installa le patch disponibili.
Problemi audio:
- Assicurati che gli altoparlanti del televisore siano accesi e che il volume sia alto.
- Controlla se il tuo televisore ha impostazioni di ingresso audio separate per le connessioni USB.
- Prova a utilizzare delle cuffie o degli altoparlanti esterni collegati al telefono.
Video in ritardo o a scatti:
- Chiudi tutte le app o i processi non necessari in esecuzione sul tuo telefono.
- Utilizzare un cavo USB ad alta velocitào adattatore.
- Per una riproduzione più fluida, abbassare la risoluzione o il frame rate.
Ricorda, un po' di pazienza e perseveranza possono fare la differenza nella risoluzione dei problemi. E se tutto il resto fallisce, non aver paura di cercare aiuto da forum online affidabili, dal supporto del produttore o da quell'amico esperto di tecnologia che sembra sempre avere le risposte.
Ottimizzazione delle prestazioni:
Ora che hai la tua connessione USB attiva e funzionante, è il momento di ottimizzare la tua configurazione per la migliore esperienza possibile. Immagina di mettere a punto un motore ad alte prestazioni: qualche ritocco qua e là può fare un mondo di differenza.
Regola le impostazioni dello schermo: La maggior parte delle TV e dei telefoni offre un'ampia gamma di impostazioni di visualizzazione che possono migliorare notevolmente la tua esperienza visiva. Gioca con opzioni come luminosità, contrasto, temperatura del colore e persino modalità preimpostate come "Cinema" o "Gioco" per trovare l'equilibrio perfetto per le tue esigenze.
Abilita modalità ad alta risoluzione: Se i tuoi dispositivi lo supportano, abilitare modalità ad alta risoluzione come 4K o 1440p può fornire un livello di dettaglio e chiarezza che ti farà brillare gli occhi. Sii consapevole del potenziale impatto sulle prestazioni su dispositivi più vecchi o meno potenti.
Utilizzare un cavo USB ad alta velocità: Sebbene il vecchio cavo USB possa funzionare, investire in un cavo ad alta velocità (USB 3.0 o versione successiva) può migliorare significativamente la velocità di trasferimento dati e ridurre ritardi o interruzioni, soprattutto durante lo streaming di video ad alta risoluzione o durante i giochi.
Ottimizza le prestazioni del telefono: Chiudi tutte le app o i processi non necessari in esecuzione sul tuo telefono per liberare risorse ed evitare colli di bottiglia nelle prestazioni. Potresti anche voler considerare di abilitare le modalità di prestazioni o le funzionalità di overclocking se il tuo telefono le supporta (ma fai attenzione, perché questo potrebbe potenzialmente influire sulla durata della batteria o sulla stabilità del dispositivo).
Posizionare i dispositivi in modo strategico: Che ci crediate o no, anche la collocazione fisica dei vostri dispositivi può avere un impatto sulle prestazioni. Cercate di ridurre al minimo la lunghezza dei cavi e tenete il telefono e la TV relativamente vicini tra loro per ridurre il potenziale degrado del segnale o l'interferenza.
Ricorda, l'ottimizzazione della tua configurazione è un processo continuo. Non aver paura di sperimentare e trovare le impostazioni che funzionano meglio per il tuo caso d'uso specifico, che si tratti di streaming di film, giochi o semplicemente di goderti un display più grande per le attività quotidiane.
Soluzioni alternative
Sebbene le connessioni USB offrano un fantastico mix di semplicità e versatilità, non sono l'unica scelta possibile. La tecnologia è in continua evoluzione e soluzioni alternative emergono sempre, ciascuna con i suoi pro e contro.
Opzioni di connessione wireless:
Se non sei un fan dei cavi (o semplicemente non riesci a trovare l'adattatore giusto), il mirroring dello schermo wireless potrebbe essere la soluzione giusta. Le opzioni più diffuse includono:
Miracast: Integrato in molti dispositivi moderni, Miracast consente di trasmettere in modalità wireless il display del telefono su TV o adattatori compatibili, senza bisogno di cavi o app aggiuntive.
Cromocast: Il piccolo e ingegnoso dispositivo di streaming di Google ti consente di "trasmettere" contenuti dal tuo telefono o altri dispositivi direttamente alla tua TV. Non è un vero mirroring, ma è un'ottima opzione per lo streaming di video, foto e persino giochi.
Giocare ad aria:La tecnologia proprietaria di mirroring dello schermo di Apple funziona perfettamente tra iPhone, iPad e Apple TV, rendendola una scelta comoda per coloro che hanno già investito nell'ecosistema Apple.
Sebbene le soluzioni wireless offrano praticità e flessibilità senza pari, a volte possono presentare problemi di ritardo, interferenza o compatibilità, soprattutto in ambienti wireless affollati o con dispositivi più vecchi.
Connessioni assistite dall'app:
Se stai cercando una soluzione più specializzata, ci sono numerose app di terze parti che possono facilitare le connessioni USB o offrire funzionalità aggiuntive oltre al semplice mirroring dello schermo. Ecco alcune opzioni popolari:
Droid@Screen:Questa potente app ti consente di trasmettere lo schermo del tuo dispositivo Android sulla TV o sul computer tramite USB, offrendo anche funzionalità come il trasferimento di file, il controllo remoto e persino lo streaming di giochi.
Schermo X-Display cablato Splashtop: Grazie al supporto per connessioni USB e wireless, Splashtop Wired XDisplay offre un'esperienza di mirroring fluida con bassa latenza e funzionalità avanzate come il controllo touch e lo streaming audio.
Specchio di Apower: Progettato sia per dispositivi Android che iOS, ApowerMirror offre una gamma di opzioni di connessione, tra cui USB, Wi-Fi e persino il mirroring basato su cloud, il che lo rende una scelta versatile per varie configurazioni.
Sebbene queste app spesso comportino costi aggiuntivi o abbonamenti, possono offrire un'esperienza più solida e ricca di funzionalità rispetto alle soluzioni di mirroring integrate.

Conclusione
Ed ecco qua, gente: una guida completa per collegare il telefono alla TV tramite USB, completa di suggerimenti per la risoluzione dei problemi, strategie di ottimizzazione e soluzioni alternative. Ormai, siete praticamente degli esperti di connessioni USB!
Ma perché fermarsi qui? Con le conoscenze che hai acquisito, puoi diventare la risorsa di riferimento per tutti i tuoi amici e familiari che cercano di sbloccare la potenza dei loro dispositivi. Immagina l'espressione sui loro volti quando entri casualmente, colleghi il loro telefono alla TV con qualche mossa abile e dichiari: "Di niente!"
Parlando seriamente, le connessioni USB offrono un modo semplice ma potente per colmare il divario tra i tuoi dispositivi mobili e il grande schermo. Che tu voglia condividere ricordi, giocare su larga scala o semplicemente goderti un'esperienza mobile più immersiva, il mondo della connettività USB è tuo.
Quindi, vai avanti, connettiti e conquista, perché in questa era digitale, la capacità di integrare perfettamente i tuoi dispositivi è un superpotere che ti sarà molto utile. E chi lo sa? Forse un giorno collegheremo i nostri smartphone a display olografici o proietteremo la realtà aumentata direttamente dalle nostre tasche. Le possibilità sono infinite e tu, amico mio, ora sei equipaggiato per abbracciarle tutte!
Le persone chiedono anche
Perché il mio telefono non si connette alla TV tramite USB?
Potrebbero esserci diversi motivi per cui il tuo telefono non si connette alla TV tramite USB:
- Cavo USB incompatibile: assicurati di utilizzare un cavo USB compatibile per il trasferimento dei dati.
- Modalità USB non corretta: assicurati che il telefono sia impostato sulla modalità USB corretta (ad esempio, MTP o Trasferimento file).
- Porta USB difettosa: controlla che le porte USB del telefono e della TV non siano danneggiate o presenti detriti.
- Problemi software: aggiorna il software del tuo telefono e verifica eventuali problemi di compatibilità tra il telefono e la TV.
Come faccio a collegare la mia USB alla TV senza una porta USB?
Se il televisore non dispone di una porta USB, è comunque possibile collegare il dispositivo USB utilizzando metodi alternativi:
- Adattatore da HDMI a USB: utilizza un adattatore da HDMI a USB se il tuo televisore ha una porta HDMI.
- Lettore multimediale: collega la tua USB a un lettore multimediale collegabile alla tua TV.
- Smart TV box: utilizza uno smart TV box che supporti la connettività USB per accedere ai contenuti USB sul tuo televisore.
Come faccio a collegare il mio telefono Android alla mia normale TV tramite USB?
Per collegare il tuo telefono Android a una normale TV tramite USB, segui questi passaggi:
- Utilizza MHL o SlimPort: verifica se il tuo telefono supporta la tecnologia MHL o SlimPort per la conversione da USB a HDMI.
- Adattatore da USB-C a HDMI: utilizza un adattatore da USB-C a HDMI se il tuo telefono ha una porta USB-C.
- Mirroring dello schermo: alcuni telefoni Android supportano il mirroring dello schermo tramite USB, consentendo di visualizzare lo schermo del telefono sulla TV.
Quale formato deve avere una chiavetta USB per la TV?
La maggior parte delle TV supporta unità USB formattate in FAT32 o exFAT. Assicurati che la tua unità USB sia formattata in uno di questi formati per garantire la compatibilità con la tua TV. Inoltre, controlla il manuale o le specifiche della tua TV per eventuali requisiti di formato specifici che potrebbe avere.


12 Commenti
Like
RXZ84Q5
RXZ84Q5
USB cable connected
USB cable connected karna hai