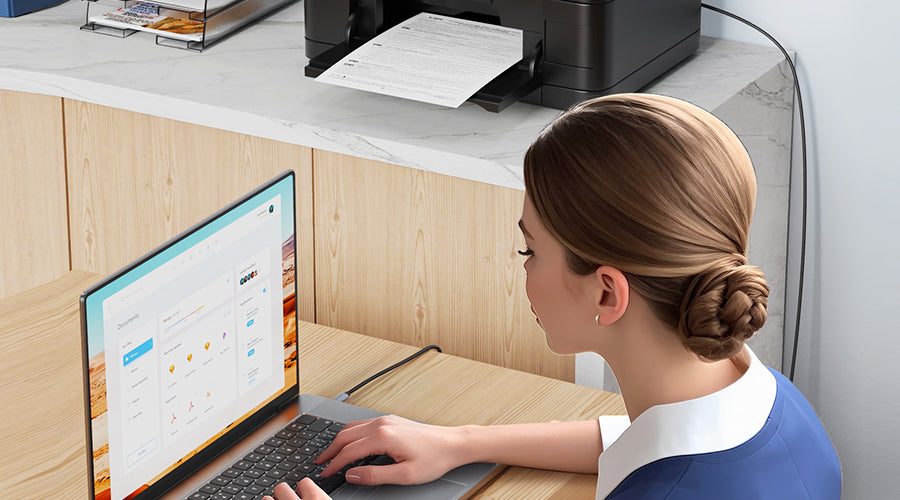
Ti sei mai trovato in difficoltà, a fissare il tuo fedele laptop e la tua nuova stampante scintillante, chiedendoti come farli parlare? Non preoccuparti, ci siamo passati tutti! Collegare una stampante al tuo laptop con un cavo potrebbe sembrare un compito arduo, ma fidati, è un gioco da ragazzi una volta che impari le basi. Quindi, prendi una comoda sedia e tuffiamoci nell'entusiasmante mondo della connettività stampante-laptop!
Indice dei contenuti
- 1. Introduzione
- 2. Scelta del cavo della stampante giusto
- 3. Passaggi di connessione dettagliati
- 4. Installazione e configurazione del driver
- 5. Suggerimenti per la risoluzione dei problemi per le connessioni cablate della stampante
- 6. Test e ottimizzazione della stampa
- 7. Manutenzione e cura
- 8. Conclusione
- 9. Le persone chiedono anche
- 9.1 Quali sono i potenziali rischi derivanti dall'utilizzo di cavi per stampanti generici o di bassa qualità per i miei collegamenti?
- 9.2 In che modo le interferenze elettromagnetiche (EMI) possono influire sulle prestazioni del cavo della stampante e come posso ridurle al minimo?
- 9.3 In quali scenari dovrei prendere in considerazione l'utilizzo di una connessione wireless per la stampante anziché una cablata?
- 9.4 Ci sono considerazioni specifiche da tenere a mente quando si collega una stampante a un computer portatile utilizzando interfacce meno recenti, come porte parallele o seriali?
- 9.5 L'utilizzo di un hub USB o di un cavo di prolunga può influire sulla qualità della connessione della mia stampante? E come posso garantire le migliori prestazioni?
Introduzione

Ora, prima di entrare nei dettagli, parliamo dei vantaggi dell'uso di un cavo per collegare la stampante al portatile. Le connessioni wireless sono fantastiche e tutto il resto, ma a volte possono essere pignole, lasciandoti con lavori di stampa interrotti e frustrazione infinita. Con una connessione cablata, ottieni un collegamento stabile e affidabile che non ti deluderà quando hai una scadenza ravvicinata.
Ecco alcuni dei principali vantaggi della connessione della stampante tramite cavo anziché wireless:
- Affidabilità: Le connessioni cablate non soffrono di interferenze come il WiFi. Eviterai problemi come perdita di connettività, interruzioni del segnale e lavori di stampa interrotti.
- Velocità: I dati viaggiano molto più velocemente sui cavi che in modalità wireless, specialmente per file di grandi dimensioni come le immagini ad alta risoluzione. Le connessioni cablate per stampanti offrono velocità di stampa fulminee.
- Sicurezza: Le reti cablate sono meno vulnerabili agli attacchi informatici e alle intrusioni.Si riduce il rischio che qualcuno acceda in modo fraudolento alla stampante e ai documenti.
- Compatibilità: La connettività cablata funziona perfettamente con quasi tutti i laptop e le stampanti senza complesse impostazioni e configurazioni. Semplicemente plug-and-play!
Quindi, se stabilità, velocità, sicurezza e semplicità sono importanti per te, collegare i tuoi dispositivi con un cavo è la strada da seguire. Ora diamo un'occhiata alla scelta del cavo perfetto per il lavoro...
Scelta del cavo della stampante giusto
Ah, il cavo importantissimo! È come il ponte che consente al tuo laptop e alla tua stampante di comunicare, quindi scegliere quello giusto è fondamentale. Abbiamo un sacco di cavi diversi tra cui scegliere, come USB-C, USB-A, USB-B e altro ancora. È come camminare in un negozio pieno di cavi di collegamento di ogni forma e stile immaginabile!
Ma niente paura, ti guideremo attraverso questa giungla di cavi e ti aiuteremo a scegliere quello perfetto per i tuoi dispositivi. Ecco alcuni dei principali contendenti:
| Tipo di cavo | Compatibilità | Velocità di trasferimento | Durata |
| USB-C | Nuovi computer portatili e stampanti | Super veloce | Costruito per durare |
| USB-A | Computer portatili e stampanti più vecchi | Abbastanza veloce per la maggior parte delle esigenze | Solido e affidabile |
| USB-B | Stampanti più vecchie | Velocità decente | Porta a termine il lavoro |
Ora, quando si tratta di scegliere il cavo perfetto, è opportuno considerare alcuni fattori chiave:
- Compatibilità delle porte: Assicurati che i connettori dei cavi corrispondano alle porte sia del tuo portatile che della tua stampante. Vuoi quella calzata personalizzata per i guanti!
- Velocità di trasferimento: Cavi più veloci significano meno attesa quando stampi documenti di grandi dimensioni o molte immagini. USB-C è incredibilmente veloce mentre i vecchi tipi USB sono più moderati.
- Durata: Hai bisogno di un cavo che resista a ripetuti collegamenti della stampante, incidenti e usura generale senza rompersi prematuramente.
E se stai cercando un cavo di qualità eccellente che soddisfi tutti questi requisiti, ti presentiamo gli eroi del mondo dei cavi: TEMPO DI CAVO.Questi cavi sono come i supereroi della connettività, con il loro design elegante, velocità di trasferimento fulminee e una durevolezza che può resistere anche alle battaglie più intense tra stampante e portatile.
I cavi Cabletime sono appositamente progettati utilizzando conduttori in rame di alta qualità e schermatura di prima qualità. Superano di gran lunga gli standard del settore per la durata dei connettori, possono trasmettere dati fino a 10 Gbps e sono dotati di una garanzia a vita senza problemi.
Quindi, per un cavo su cui puoi contare per collegare la tua stampante e il tuo laptop e tenerli connessi attraverso qualsiasi avversità, non cercare oltre Cabletime. Ok, è il momento di passare all'attività principale!
Passaggi di connessione dettagliati
Bene, ora che hai il tuo cavo a posto, tuffiamoci nel processo di connessione! Segui questi semplici passaggi e in men che non si dica avrai la tua stampante e il tuo laptop BFF:
Passaggio 1: accendi i tuoi dispositivi
Assicuratevi che sia il vostro portatile che la stampante siano accesi e alimentati prima di collegarli. Cercare di collegare dispositivi spenti è una ricetta per la frustrazione!
Passaggio 2: individuare le porte
Adesso è il momento di individuare le porte fisiche su ciascun dispositivo in cui collegherai le estremità del cavo di collegamento.
Sul tuo stampante, le porte sono spesso posizionate sul retro o a volte sul lato. Possono avere un'icona USB o un testo come "USB-B" accanto. Consulta il manuale della stampante se hai problemi a individuare le porte.
Sul tuo computer portatile, Le porte USB-A e USB-C si trovano solitamente lungo i bordi o sul retro. Cerca le loro forme rettangolari distintive per identificarle. Potresti dover capovolgere il tuo laptop, sbirciare sotto la cerniera dietro lo schermo o posizionarlo in verticale per accedere alle porte.
Hai scelto le porte? Colleghiamo questo coso!
Passaggio 3: collegare il cavo
Con i dispositivi accesi e le porte individuate, prendi il cavo della stampante e:
- Allinea delicatamente un'estremità con la porta corrispondente sul tuo computer portatile. I connettori dei cavi di qualità sono contrassegnati con colori diversi e con icone che indicano dove va ciascuna estremità.
- Spingere con fermezza ma attenzione l'estremità del cavo direttamente nella porta del laptop finché non scatta saldamente in posizione. Non piegare o spingere con forza il connettore, poiché ciò rischia di danneggiare la porta.
- Seguire la stessa procedura per inserire l'altra estremità del cavo nella porta della stampante identificata, fino al completo inserimento.
Ed ecco fatto, hai collegato fisicamente il tuo portatile e la tua stampante! Ora dobbiamo solo installare il software giusto per farli comunicare tra loro.
Installazione e configurazione del driver
Ah, driver e software: gli eroi non celebrati che consentono ai nostri dispositivi di comunicare! Senza i driver giusti che fungono da interpreti tra il tuo laptop e la tua stampante, avrai solo due pezzi di hardware che si fissano goffamente.
Lasciate che vi spieghiamo l'intero processo di installazione del driver...
Identifica il modello della tua stampante
I driver sono progettati per modelli di stampante specifici, quindi inizia determinando il marchio e il numero di modello del tuo dispositivo. Ci sono alcuni modi per scoprirlo:
- Controllare l'etichetta o l'incisione sulla stampante stessa
- Cerca il modello sulla ricevuta d'acquisto
- Trova il nome del modello nel manuale o nei documenti della tua stampante
Una volta individuata l'identità della tua stampante, potrai trovare i driver più recenti pensati appositamente per essa.
Scarica i driver dal sito Web del produttore
Una volta ottenuti i dettagli del modello, la tappa successiva è il sito web del produttore della stampante.Tutti i principali marchi, come HP, Canon, Epson, ecc., forniscono download di driver sui propri siti.
Dovrai navigare verso sezioni come "Supporto" o "Download" e poi selezionare il modello della tua stampante. Qui troverai i driver più aggiornati compatibili con il tuo dispositivo.
Installare i driver della stampante
Hai trovato i driver giusti, quindi è il momento di caricarli sul tuo portatile! Ecco una guida passo passo:
- Fare doppio clic sul file del driver scaricato per avviare l'installazione.
- Accettare i contratti di licenza e seguire le istruzioni di configurazione visualizzate sullo schermo.
- Selezionare le opzioni che ottimizzano il driver per il modello di stampante, il sistema operativo e il tipo di connessione, quando proposte.
- Fare clic su "Installa" quando viene visualizzata l'opzione per caricare completamente il driver sul sistema.
Ecco fatto! Il processo di installazione richiede in genere solo pochi minuti. Una volta completato, il tuo laptop può "parlare" direttamente con la tua stampante.
Configurare le impostazioni della stampante
Dopo l'installazione del driver, potrebbero essere necessarie alcune configurazioni aggiuntive una tantum della stampante nel sistema operativo:
Finestre
- Aprire il menu Start > Impostazioni > sezione Stampanti e scanner
- Fai clic su "Aggiungi una stampante o uno scanner"
- Seleziona il modello della stampante appena connessa e segui le istruzioni per completare la configurazione
MacOS
- Vai a Preferenze di Sistema > Stampanti e Scanner
- Fare clic su "+" per aggiungere la stampante e scegliere il modello dal menu
- Configurare tutte le opzioni come la qualità di stampa o il formato della carta
Fai riferimento alla documentazione della stampante o alle guide utente specifiche del sistema operativo se hai bisogno di maggiori dettagli sul processo di configurazione. Ma essenzialmente, stai solo personalizzando il modo in cui il tuo sistema interagisce con il tuo particolare modello di stampante.
E questo è tutto! Con i driver installati correttamente e le impostazioni della stampante configurate, ora hai una relazione di stampa completamente funzionale tra il tuo laptop e la stampante. È il momento di provare questa meraviglia!
Suggerimenti per la risoluzione dei problemi per le connessioni cablate della stampante

Ok, diciamo la verità: anche con i migliori cavi e driver, a volte le cose possono andare male nel mondo della tecnologia. Fortunatamente, nel corso degli anni abbiamo raccolto un sacco di consigli sulla risoluzione dei problemi per aiutarti a superare qualsiasi problema di connettività della stampante:
Problema n. 1: la stampante non viene rilevata dal laptop
Questo è uno degli scenari più comuni in cui la gente si imbatte: hai collegato i dispositivi, ma il tuo portatile si comporta come se la tua stampante non esistesse nemmeno! Molto maleducato...
| Possibile causa | Correzioni e suggerimenti |
| Collegamento del cavo allentato | Verificare che il cavo sia inserito completamente in entrambe le porte |
| Driver obsoleti | Scarica gli ultimi driver per la stampante |
| Guasto della porta o del cavo | Scambia le porte o prova un cavo diverso |
| Problema di alimentazione | Controllare i cavi di alimentazione su entrambi i dispositivi |
Soluzioni rapide:
- Riavviare/spegnere la stampante e il laptop
- Prova una porta USB diversa sul laptop
- Ispezionare il cavo/le porte per eventuali danni
Se quanto sopra non fa riconoscere la stampante, scaricare di nuovo i driver più aggiornati dal produttore (o reinstallarli se già scaricati) in genere risolve il problema. Questo assicura la massima compatibilità tra il sistema operativo, il software e il modello di stampante.
Problema n. 2: errori e guasti di stampa
Potresti imbatterti in situazioni in cui i tuoi lavori di stampa non vengono completati correttamente. Invece delle tue splendide immagini o dei tuoi importanti documenti, tutto ciò che ottieni è un triste pezzo di carta bianca.Non è l'ideale!
| Possibile causa | Correzioni e suggerimenti |
| Conflitti software | Chiudere gli altri programmi durante la stampa |
| Problemi con lo spooler di stampa | Riavviare il servizio spooler di stampa |
| Risorse hardware ridotte | Aggiungere RAM dedicata alla stampante |
| Polvere/detriti nella stampante | Pulisci l'interno del telaio della stampante |
Soluzioni rapide:
- Verificare la presenza di aggiornamenti software/firmware della stampante
- Elimina tutti i lavori di stampa e inviali nuovamente
- Spegnere e riaccendere la stampante
Se il riavvio, la pulizia e gli aggiornamenti software non risolvono i problemi di stampa, potrebbe esserci un problema meccanico con la stampante stessa. È il momento di tirare fuori la garanzia! Contatta il team di supporto del produttore o il tuo centro riparazioni locale per ricevere assistenza.
Problema n. 3: Velocità di stampa lente
Poche cose nella vita sono più frustranti dell'attesa...e attesa...e attesa che le tue pagine escano lentamente dalla stampante. Quando ti aspetti un'efficienza nitida ma invece ottieni prestazioni lente, prova questi suggerimenti per aumentare la velocità:
| Possibile causa | Correzioni e suggerimenti |
| Cavo obsoleto | Utilizzare il cavo USB 3.0/USB-C per una trasmissione dati più rapida |
| Troppi programmi in esecuzione | Chiudere le app inutilizzate per liberare risorse di elaborazione |
| Vecchio modello di stampante | Passa a una stampante fotografica più nuova e veloce |
Soluzioni rapide:
- Controlla gli aggiornamenti driver/firmware con miglioramenti delle prestazioni
- Regola le impostazioni della stampante come la qualità di stampa o la risoluzione per dare priorità alla velocità
- Se si utilizza un laptop, collegare il cavo di alimentazione per disattivare le modalità di risparmio energetico
Le ultime porte USB-C e USB 3.2 cavi supporta velocità dati fulminee di 10 Gbps, quindi aggiornare il connettore può fornire un notevole incremento delle prestazioni. Ma se l'hardware della stampante è di vecchia generazione, potrebbe semplicemente non avere la potenza necessaria per risultati rapidi. È il momento di un aggiornamento!
Test e ottimizzazione della stampa
A questo punto, la stampante e il portatile sono collegati correttamente! Ma prima di tuffarti a capofitto nella stampa del tuo capolavoro segreto di scrapbooking o di inviare un elaborato finale, è consigliabile eseguire una rapida stampa di prova. Bisogna assicurarsi che questa connessione funzioni a dovere, dopotutto!
Ecco una semplice procedura per confermare che la tua configurazione funzioni perfettamente:
Passaggio 1: stampare una pagina di prova
Crea o apri un documento/immagine di base e seleziona Stampa. Utilizza carta comune e impostazioni di stampa rapida standard. I file di prova semplici potrebbero includere:
- Documento Word/Testo vuoto di una sola pagina
- Pagina di test del sistema predefinita
- Immagine di base come un JPG a colori pieni
Fase 2: Valutare i risultati di stampa
Ispezionare attentamente l'output di stampa di prova per individuare eventuali problemi quali:
- Testo mancante/sbiadito
- Elementi macchiati o sfocati
- Bande, striature o linee
- Scarsa qualità dell'immagine
Se la pagina di prova viene stampata in modo chiaro e senza difetti, congratulazioni! La connessione della stampante è pronta.
Passaggio 3: modifica le impostazioni per ottenere la migliore qualità
Se le stampe di prova presentano problemi di qualità, prova a modificare le impostazioni della stampante come:
- Tipo e formato della carta
- Livelli di inchiostro
- Risoluzione di stampa
- Profili colore
Passaggio 4: pulisci e mantieni la stampante
Risultati di stampa di prova scadenti potrebbero anche indicare un problema hardware, come testine di stampa intasate o sporche. Seguire le linee guida del produttore per pulire l'interno dello chassis della stampante. Sostituire le vecchie cartucce di inchiostro per ottenere le migliori prestazioni.
E questo è tutto! Con stampe di prova impeccabili in mano, puoi iniziare a stampare progetti con sicurezza e in totale tranquillità.
Manutenzione e cura
Bene, la tua stampante è ora collegata perfettamente al tuo portatile, e sforna stampe di qualità da campione. Ma non essere compiacente! Per salvaguardare le prestazioni della tua stampante a lungo termine e prevenire problemi, assicurati di incorporare una manutenzione regolare.
Immagina di portare la tua auto per ispezioni e messe a punto di routine. Con qualche TLC occasionale, la tua stampante funzionerà senza problemi per anni anziché rompersi inaspettatamente. Ecco i nostri migliori consigli per mantenere il tuo sistema di stampa in condizioni ottimali:
- Mantienilo pulito
L'accumulo di polvere nelle stampanti può causare ogni genere di scompiglio, dal degrado della qualità di stampa agli inceppamenti della carta e ai guasti di alimentazione. Ecco perché è così importante una pulizia esterna e interna regolare:
- Utilizzare aria compressa per spolverare l'esterno e l'interno del telaio della stampante circa una volta al mese
- Pulire delicatamente le testine di stampa quando si sostituiscono le cartucce di inchiostro/toner
- Mantenere pulite le parti di ricambio della stampante come rulli e cuscinetti utilizzando alcol isopropilico
- Controllare i collegamenti e i cavi
Con il passare del tempo, è facile che i cavi della stampante si allentino o si strappino accidentalmente, compromettendo la qualità di stampa o facendo scomparire le connessioni.
- Ispezionare le estremità dei cavi, le porte e gli adattatori per verificare che non siano allentati o danneggiati
- Ricollegare saldamente tutti i collegamenti allentati
- Si consideri di fissare i cavi con fascette/ancoraggi per la protezione dagli incidenti
- Aggiornare Firmware e Software
I produttori di stampanti rilasciano periodicamente aggiornamenti del firmware con grandi miglioramenti delle prestazioni, nuove funzionalità e future proofing. Lo stesso vale per il software del driver!
- Controllare regolarmente i siti di supporto per gli ultimi aggiornamenti del firmware
- Scarica e installa le nuove versioni dei driver quando disponibili
In questo modo l'hardware e l'interfaccia della stampante restano ottimizzati per adattarsi ai mutevoli ambienti del sistema operativo e agli standard di funzionalità.
- Utilizzare parti e materiali di qualità
L'inchiostro, il toner, la carta e persino i pezzi di ricambio economici di terze parti spesso sembrano allettanti, ma le prestazioni inferiori o la durata più breve superano qualsiasi piccolo risparmio iniziale sui costi:
- Utilizzare le cartucce OEM per evitare intasamenti e problemi di qualità
- Acquista carta fotografica premium più spessa per stampare immagini vivide
- Sostituire i componenti solo con hardware approvato dal produttore
Spendere qualche soldo in più per materiali di consumo di qualità evita grattacapi in futuro!
Se fai della cura e della manutenzione della stampante un'abitudine fin dall'inizio, eviterai molte frustrazioni e manterrai il tuo sistema di stampa come nuovo anche dopo anni di fedele servizio. Ora concludiamo con un po' di saggezza finale...
Conclusione
Bene, ecco fatto! Abbiamo trattato tutto ciò che devi sapere per collegare correttamente una stampante al tuo laptop!
Dalla scelta del cavo giusto all'installazione dei driver, dalla risoluzione dei problemi di connettività alla messa a punto dell'output di stampa, abbiamo predisposto una procedura dettagliata passo dopo passo.
Segui i nostri consigli per l'avventura del cablaggio della stampante ed eviterai frustrazioni mentre migliori le tue abilità di stampa. Prima che tu te ne accorga, sfornerai foto meravigliose, documenti nitidi e forse anche stampe 3D.
Le persone chiedono anche
Quali sono i potenziali rischi derivanti dall'utilizzo di cavi per stampanti generici o di bassa qualità per i miei collegamenti?
L'utilizzo di cavi per stampanti generici o di bassa qualità può causare vari problemi, come corruzione dei dati, connettività intermittente e velocità di stampa più lente. Questi cavi potrebbero non soddisfare gli standard necessari di schermatura e integrità del segnale, con conseguente degradazione del segnale e maggiore suscettibilità alle interferenze elettromagnetiche (EMI). Inoltre, potrebbero non essere compatibili con le interfacce più recenti per stampanti e computer, causando problemi di compatibilità o limitando le funzionalità disponibili.
In che modo le interferenze elettromagnetiche (EMI) possono influire sulle prestazioni del cavo della stampante e come posso ridurle al minimo?
L'interferenza elettromagnetica (EMI) può avere un impatto significativo sulle prestazioni del cavo della stampante introducendo rumore e distorsione del segnale, causando errori nei dati, connessioni interrotte e velocità di trasferimento ridotte. Per ridurre al minimo l'EMI, si consiglia di utilizzare cavi schermati con una messa a terra adeguata, evitare di far passare i cavi vicino a fonti di radiazioni elettromagnetiche (ad esempio, linee elettriche, motori) e mantenere un sistema di gestione dei cavi pulito e organizzato.
In quali scenari dovrei prendere in considerazione l'utilizzo di una connessione wireless per la stampante anziché una cablata?
Le connessioni wireless per stampanti offrono maggiore flessibilità e praticità, specialmente in situazioni in cui è difficile far passare i cavi o quando è necessario condividere una stampante tra più dispositivi o sedi. Tuttavia, le connessioni cablate in genere offrono una migliore affidabilità, velocità di trasferimento dati più elevate e una maggiore sicurezza.Se mobilità e facilità di configurazione sono prioritarie, si consiglia di utilizzare una connessione wireless, ma sii consapevole delle potenziali limitazioni delle prestazioni e dei rischi per la sicurezza.
Ci sono considerazioni specifiche da tenere a mente quando si collega una stampante a un computer portatile utilizzando interfacce meno recenti, come porte parallele o seriali?
Collegare una stampante a un laptop utilizzando interfacce più vecchie come porte parallele o seriali può essere complicato a causa della disponibilità limitata di queste porte sui laptop moderni. Se devi utilizzare queste interfacce, potresti dover acquistare adattatori o cavi convertitori, che possono causare problemi di compatibilità e limitazioni delle prestazioni. Inoltre, le interfacce più vecchie potrebbero non supportare funzionalità avanzate della stampante o velocità di trasferimento dati più elevate. In genere, si consiglia di utilizzare interfacce più moderne come USB o Ethernet per una migliore compatibilità e prestazioni.
L'utilizzo di un hub USB o di un cavo di prolunga può influire sulla qualità della connessione della mia stampante? E come posso garantire le migliori prestazioni?
L'utilizzo di un hub USB o di un cavo di estensione può potenzialmente influire sulla qualità della connessione della stampante, soprattutto se l'hub o il cavo sono di bassa qualità o non soddisfano le specifiche necessarie. Cavi e hub più lunghi possono introdurre degradazione del segnale, con conseguenti velocità di trasferimento dati più lente o problemi di connettività intermittenti. Per garantire le migliori prestazioni, utilizzare cavi e hub USB schermati di alta qualità, evitare di collegare a cascata più hub e mantenere le lunghezze dei cavi il più corte possibile.


Lascia un commento
Questo sito è protetto da hCaptcha e applica le Norme sulla privacy e i Termini di servizio di hCaptcha.